пятница, 21 апреля 2017 г.

Onward, spring

We've gotten a lot of rain in Central Florida in the last week, which has made the garden happy, happy, happy.


onward spring, gardening, I bought a Feijoa sellowiana standard to go right next to my patio a couple of years ago and it really struggled for awhile But finally blooms


onward spring, gardening, Salvia greggii Lipstick blooms non stop in my garden Here it is with Bulbine frutescens behind it


onward spring, gardening, Here Lipstick combines with Cuphea ignea another perpetual bloomer


onward spring, gardening, Salvia hybrida Wendy s Wish with new foliage on the Vitex agnus castus


Original article and pictures take http://www.hometalk.com/1354961/onward-spring site

вторник, 18 апреля 2017 г.

Shabby Angel Wings (diy)


I was really wanting to neutralize my Holiday decor this year. I'm a total sucker for Valentine's Day and love to do some fun things around the house. I have been eyeing these coffee filter wings for a few years on Pinterest and finally took the plunge. I had all the supplies on hand so there was no cost! Even better right.


Materials:
Cardboard
Coffee filters
Glue gun/glue sticks
Jute/String
Feathers/Fabric/embellishments
Scissors/knife
Pencil


shabby angel wings diy, crafts, how to


Draw one side of the angel wing on a piece of cardboard cut to the size desired. Draw square tag so they can be glued together. (I free handed mine) It doesn't have to be perfect because it will all get covered. Cut out first wing. I used a knife because my cardboard was thick and my scissors weren't getting the job done. Set the wing on second piece of cardboard and trace. Cut second wing out. Fold coffee filters in half (taco) and again (pizza) then glue on cardboard. This is preference on where you glue them. I started on the edges folding coffee filters in different ways and sizes placing them in different directions. I wanted to add a little texture so I glued in some feathers (can't go wrong with feathers), and some white fabric. I cut the fabric into circles a little bit smaller then the coffee filters and used the same folding technique. I knew I wanted to put my wings on my husbands trophy buck, but at this point you will want to glue the two tabs together. Tie or glue jute to the back. Add any other embellishments, pearls, jewels ect. and hang on mantle, door, or above your bed. the possibilities are endless!


shabby angel wings diy, crafts, how to


shabby angel wings diy, crafts, how to


My most favorite Valentine's decor!


shabby angel wings diy, crafts, how to


So shabby, so chic, so white, so perfect!


shabby angel wings diy, crafts, how to


If you want to see more and some before pictures of this wall head over to the blog.


shabby angel wings diy, crafts, how to


Original article and pictures take http://www.hometalk.com/13433445/shabby-angel-wings-diy site


понедельник, 17 апреля 2017 г.

Arizona String Art


We have one wall by the TV that's pretty bare, so I've been working on turning it into a mini gallery wall. The Hubs and I made a large USA map that hangs above the TV, and I also made this smaller piece of string art in the shape of Arizona, just to even the space out. It was a lot of fun, and my daughters even helped!


The first thing we did was make a large paper map of the state. We printed out an outline, and my artsy daughter sketched a larger version on two pieces of white paper.
Then, we placed the map over a large board that we had previously stained a dark walnut color.


arizona string art, crafts, wall decor


I hammered in what seemed like tons of small nails along the outline of the state. After awhile, I really began to wish that there weren't so many curves along one side!


arizona string art, crafts, wall decor


When the state was fully outlined, I tore the paper away. In center, I made a rough star. This star serves as an anchor for the string, but it also resembles our state flag, which is cool!
I love aqua, so I bought some pretty aqua-colored string and began winding it around the nails.
My other daughter loves crafting, and she has way more patience than I do, so she took over and ended up finishing in record time!


arizona string art, crafts, wall decor


I love the way it turned out, and it was a fun family project, as well. It also looks perfect in our family room!
You can find additional tips and details on the blog. :)


arizona string art, crafts, wall decor


Original article and pictures take http://www.hometalk.com/13225833/arizona-string-art site


вторник, 11 апреля 2017 г.

Update Dark Wood 1970's Bi-Fold Closet Doors

We inherited some dark wood, hollow core 1970's bi-fold closet doors in two of our three bedrooms. When pricing out replacement doors, I was floored by the $150+ price tag...plus we had no way to get them home in our small vehicle. That's when this idea was born.It's great to use what you have to save money.


Here's our original 1970's dark wood hollow core bi-fold doors. They were in great shape, and a few coats of paint and moldings really helped bring them into the next century. See the full tutorial here: http://www.monicawantsit.com/2016/01/how-to-update-1970s-bi-fold-closet-doors.html


update dark wood 1970 s bi fold closet doors, closet, doors, painting


Original article and pictures take http://www.hometalk.com/13448861/update-dark-wood-1970-s-bi-fold-closet-doors site

понедельник, 10 апреля 2017 г.

Light Up Canvas Art


I made light up canvas art for my kids for Christmas. It's easy and fun!


Items needed:
1 canvas - I scored mine at Big Lots for $2.50
Acrylic Paint of your choice
Mod Podge
Paint brush
Image printed out - mine was printed on a laser printer so the ink wouldn't run.
Ice Pick
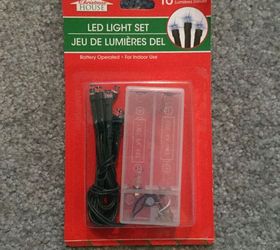
1 pack battery operated lights
Tape


light up canvas art, crafts, decoupage


Steps:

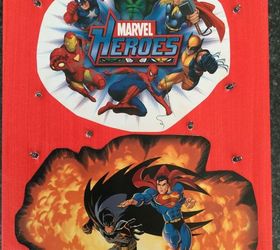
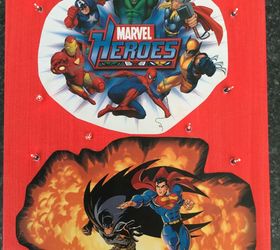
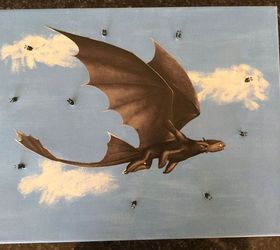
1. Paint the canvas with acrylic paint of your choice. My son's favorite color is red and my daughter's is blue so those are the colors I went with. Once done, let dry.

2. For my daughter's I wanted some clouds so I painted some white clouds on her canvas with acrylic paint and let dry.

3. Print out your image. I'm sure you could used photo paper too, but I printed out the images I wanted on good old paper using a laser printer.

4. Cut your image and space out how you would like it to look on your canvas.

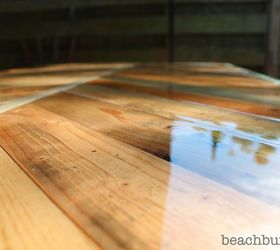
5. Mod Podge the back of the image(s) and stick to the canvas. You might have to hold them in place a bit to make sure they'll stick as paper tends to curl. After they were staying in place I Mod Podged over the top of the images and onto the canvas. Again holding them down to make sure they sticked. Once that had settled I decided to Mod Podge lightly over the whole canvas and images again. Let this dry well.


light up canvas art, crafts, decoupage


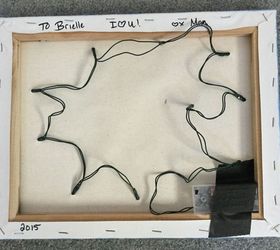
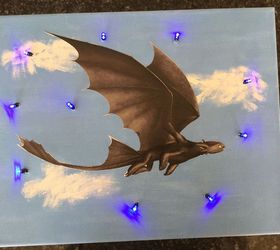
6. I took out my battery operated lights (mine came from Dollar Tree). I roughly planned out where I wanted my lights to be measuring them out on the front of the canvas. I used the ice pick to poke holes through the canvas where the lights would go.


light up canvas art, crafts, decoupage


7. I turned the picture over and taped the base to the back of the frame inside the wood setting. You could hot glue it as well. I just wanted the flexibility to change my lights in and out if they die. I pushed the lights in the holes.

*The only thing I would change is that I didn't realize how long each LED light truly was. I ended up pushing them through a little more than I wanted to because the bulb was so long it pushed against the wall when I hung them not letting them hang flush. I might change them to regular lights... we'll see.


light up canvas art, crafts, decoupage


My son loves superheroes.


light up canvas art, crafts, decoupage


light up canvas art, crafts, decoupage


My daughter loves Night Fury - Toothless


light up canvas art, crafts, decoupage


light up canvas art, crafts, decoupage


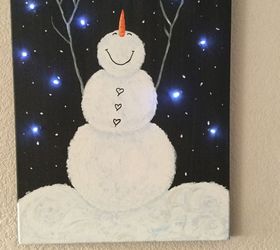
I had fun doing theirs so I made one for myself. I painted my picture and then just added the lights to it.


light up canvas art, crafts, decoupage


For those interested, I will be making a new light up canvas on Hometalk Live Monday, November 28th at 7pm EST. Hope to see you there! (Hometalk's Facebook page) Hope to see you there!


light up canvas art, crafts, decoupage


For those interested, here is my other light up art links...

http://www.hometalk.com/24498990/easy-light-u...> http://www.hometalk.com/25277390/christmas-li...> In case you missed it, here it is: https://www.facebook.com/chas.kilkergreener


light up canvas art, crafts, decoupage


Original article and pictures take http://www.hometalk.com/13403204/light-up-canvas-art site


среда, 5 апреля 2017 г.

DIY Tomato Cages - Save the Maters!


Our indeterminate (climbing) tomatoes needed a way to grow and rest but the traditional cages were expensive and didn't work well. So...we made our own.


We used concrete reinforcement, formed it into cages - we've used them for two years with great results.


diy tomato cages save the maters, container gardening, gardening


It was super easy. My grandson helped me put them together in the garden - getting kids involved is a great way to teach them gardening.


diy tomato cages save the maters, container gardening, gardening


One caution in using metal in the garden - this type of fencing/reinforcement is very rough and if you don't sand down the edges, you will get lots of scratches (from the cut ends) while weeding and picking the tomatoes. BUT, they are so functional - they work so fabulously, it was very worth it for me.


diy tomato cages save the maters, container gardening, gardening


You also need to keep an eye on the plants to keep them inside the cage - they tend to wander out and then they become so long you have a hard time feeding the back into the cage.
To see more, visit Love MY DIY Home:


diy tomato cages save the maters, container gardening, gardening


Original article and pictures take http://www.hometalk.com/13501126/diy-tomato-cages-save-the-maters site


четверг, 30 марта 2017 г.

http://beachbumlivin.com Pallet Wood Coffee Table!!


Pallet Wood Coffee Table with a base made from a wooden futon I found on the side of the road. Finished it up with a distressed paint job with some chalk paint and wax then poured Epoxy Resin on top for a smooth as glass finish.
I'm giving it away on my Facebook page to celebrate and say thanks for the 'How to build a coffee table out of pallet wood' Youtube video going over 100,000 views! It can be seen here http://youtu.be/gGnUaY9zq4M


pallet wood coffee table check out beachbumlivin facebook to win, chalk paint, diy, how to, painted furniture, pallet, repurposing upcycling, woodworking projects, Pallet wood coffee table with a base made from a futon


pallet wood coffee table check out beachbumlivin facebook to win, chalk paint, diy, how to, painted furniture, pallet, repurposing upcycling, woodworking projects, Base made from a wooden futon that I found on the side of the road


pallet wood coffee table check out beachbumlivin facebook to win, chalk paint, diy, how to, painted furniture, pallet, repurposing upcycling, woodworking projects, Epoxy Resin


pallet wood coffee table check out beachbumlivin facebook to win, chalk paint, diy, how to, painted furniture, pallet, repurposing upcycling, woodworking projects, Epoxy Resin Smooth as glass


pallet wood coffee table check out beachbumlivin facebook to win, chalk paint, diy, how to, painted furniture, pallet, repurposing upcycling, woodworking projects, How to build a coffee table out of pallet wood


Original article and pictures take http://www.hometalk.com/1317739/pallet-wood-coffee-table-check-out-beachbumlivin-facebook-to-win site