Oops, I did it again. I played with your heart. Got lost in the game. Oh baby, baby.
Oh I'm sorry, I got carried away with that a little bit...I'm so embarrassed. Back in my day, Britney was not crazy and still had her hair. Of course, NSYNC will always have my heart and I liked Christina better. And my friends and I watched the Spice Girls movie like every weekend at sleepovers. I was Sporty Spice, but I got to rap all the Scary Spice parts in the songs when we sang them. Oh the early 2000's. Those were the days.
But, anyway, I did do it again. I built sliding doors number two. Remember the first ones I made? They go to my newly remodeled laundry room. They are my fav. Even more than the Spice Girls :)But I have this friend, Brooke, who has this friend, Katie, and now we are friends, too. Funny how that works. She wanted some sliding doors in her living room, so I was happy to make them...on my last snow day :) PS I don't get snow days. I work in a factory. I couldn't get my car out of the garage, so I took a "snow" (vacation) day and built these in the shop. BEST. DAY. EVER. Seriously.
These are totally different than my doors, but super easy to make. You can get full details in the blog post, but here are the basic steps:
First I built the frames form 1x4s and used pocket holes and screws to attach them. Then, I glued and nailed the boards on the back with 1 1/4" nails and a nail gun. I ripped the outside pieces to fit. It will look like this on the back.
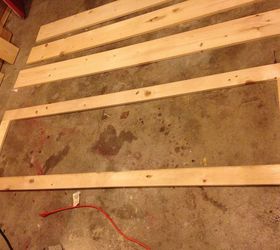 And it will look like this from the front.
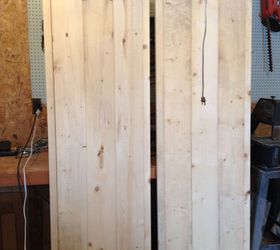 Then I cut the diagonals (more details on how in the blog post) and nailed them on the front of the door.
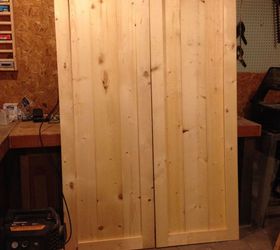 Once they were assembled and the glue was good and dry, I stained them in Minwax Provincial.
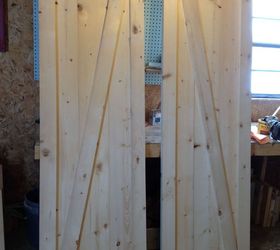 Then they were ready to install. I got the hardware together (full details in the blog post), and headed over to Katie's the next weekend to hang them.
You can check out details on how to install them in the blog post. It's all DIY and so much cheaper than the sliding door kits you buy at the hardware store.
I drilled the holes in the sliding bar on site, so I could make sure they would hit a stud.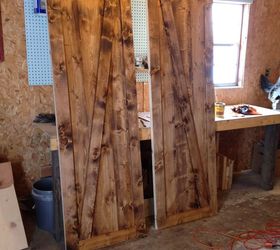 My husband helped me install them.
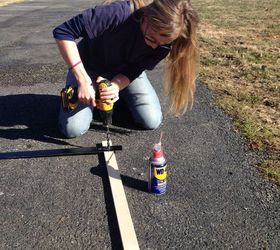 And they turned out great!
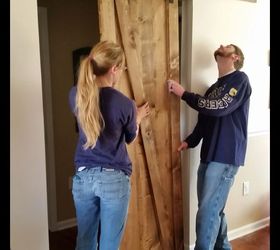 I think these doors add so much character to her living room. I left a small mess in the floor from drywall dust...SORRY KATIE! But otherwise, I think they look so good! What do you think?
Original article and pictures take http://www.hometalk.com/13637441/sliding-barn-doors-the-sequel site
Комментариев нет:
Отправить комментарий