Most people can wrap their minds around paint and flooring but are at a loss when it comes to their cabinetry. Simply painting the cabinet and leaving the marble top is the quickest, least expensive fix but if its not what you want you will change it again later.
If you are stripping the wallpaper and/or painting and changing out floor covering, why not consider a furniture vanity? I know...cost right? Yes I have seen them cost as much as $800 for a single furniture piece. Rediculous!
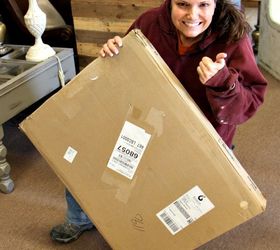
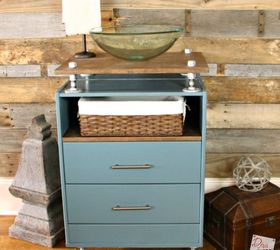
Today I am going to show you how to make a super stylish furniture vanity out of a piece of IKEA furniture. Btw, not just any piece, but a $35.00 IKEA Rast Dresser...woop woop!
Yes friends this is what we call a HACK and it is going to be the perfect addition to my lake house project.
IKEA Rast Dresser
Purebond Plywood in Maple
Minwax stain in Espresso
Assorted Plumbing Parts
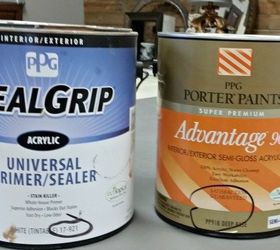
PPG SealGrip Acrylic Primer
PPG Advantage 900 Acrylic Paint
Hickory Hardware
click here for a full list of exact supplies needed
Tools Needed:
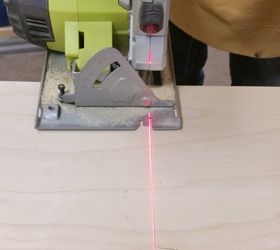
Circular Saw
Drill
Forstner bits

Step 1) Lay out all of your pieces and grab the enclosed instruction sheets. You typically don't need any additional tools but you know me...sometimes I improvise. lol
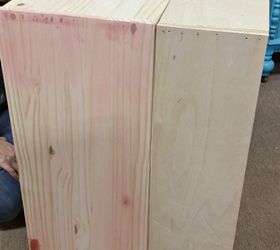
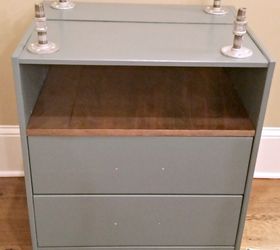
This dresser has 3 drawers but I am only opting to use two of them. Save the extra wood...we will use it later.
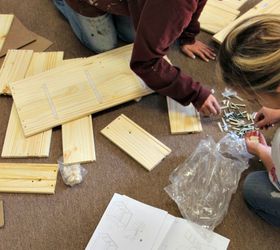
Diva Tip: I used the wood left over from the drawer I didn't use for part of the new box.
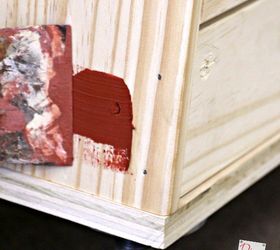
Step 4) Lightly buff your primed piece using 220-grit or higher sandpaper. This ensures a good bond and removes any rough areas before painting.
Step 5) Apply 1-2 coats of paint to your vanity. I chose PPG's Advantage 900 semi-gloss acrylic paint in the color "1037-5 Night Rendevous" and I must say...I am in love with my color choice . I also love the coverage of this paint. It went on smooth and dried extremely hard.
My design required the following cuts:
Top 24 3/4 x 18 3/4
Shelf 23 x 19
Step 9) Apply 2 coats of sealer to stained plywood. This is super important since it's a vanity and will be exposed to water. I chose a Fast-Dry Polyurethane. Let Dry.
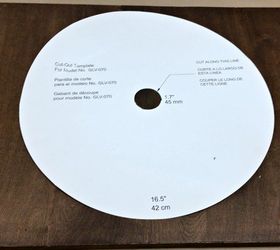
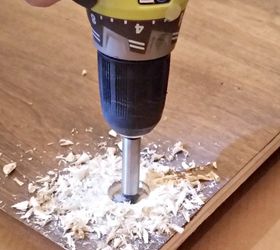
Step 10) Lay out sink template so you know where to cut your hole. This is included in the box with the bowl.
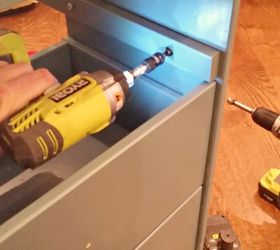
Step 16) Attach the legs to the bottom using wood screws.
Diva Tip: After attach the legs this way, I would definitely put the legs on before you put the top on.
Step 17) Attach your vessel sink. I have not attached mine yet because it will be installed at the lake house towards the end of the remodel.
Step 18) Attach the hardware. This is my favorite part of the project. It's like pairing the perfect jewelry with the perfect outfit. I chose 5 galvanized steel pulls from Hickory Hardware and they are perfect!

Original article and pictures take http://www.hometalk.com/13311174/build-this-easy-furniture-vanity-in-a-day site
Комментариев нет:
Отправить комментарий